

LEARN HOW TO STITCH
Learn the basics and the only stitch you need to complete any needlepoint project

The most basic needlepoint stitch (the “tent stitch”) is simply one diagonal stitch covering one intersection of your canvas. That’s it! It is the only stitch you need to complete any needlepoint project. To ensure your needlepoint piece has a nice, long life, you can leverage stitch techniques that make it structurally sound.
There are three variations of the tent stitch (Half Cross, Continental, and Basketweave), each of which look the same on the front of the canvas, but have different levels of durability. This guide will cover how to needlepoint and when we suggest to use each variation of the tent stitch.
HOW TO WORK WITH THREADS
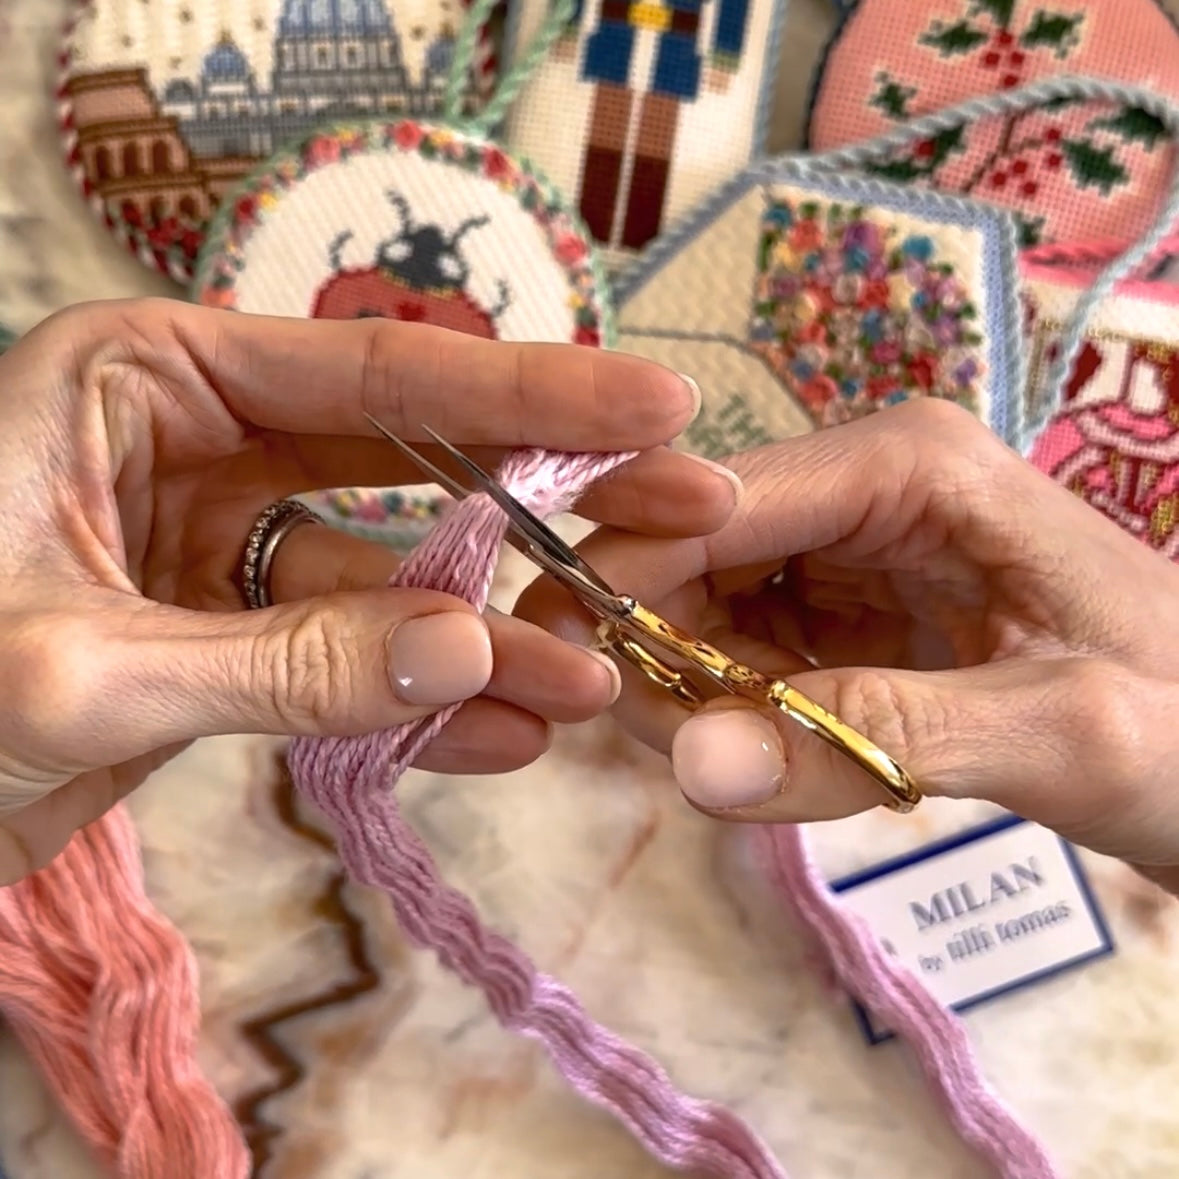
Start by carefully snipping off the knot at the end of the skein. When you unravel the skein, it will open up into a continuous loop. Cut each end of the loop to create perfect lengths of thread for stitching. I recommend tying a little piece of the fiber to the tag and keeping it to remember the color and dye lot for future stitching.
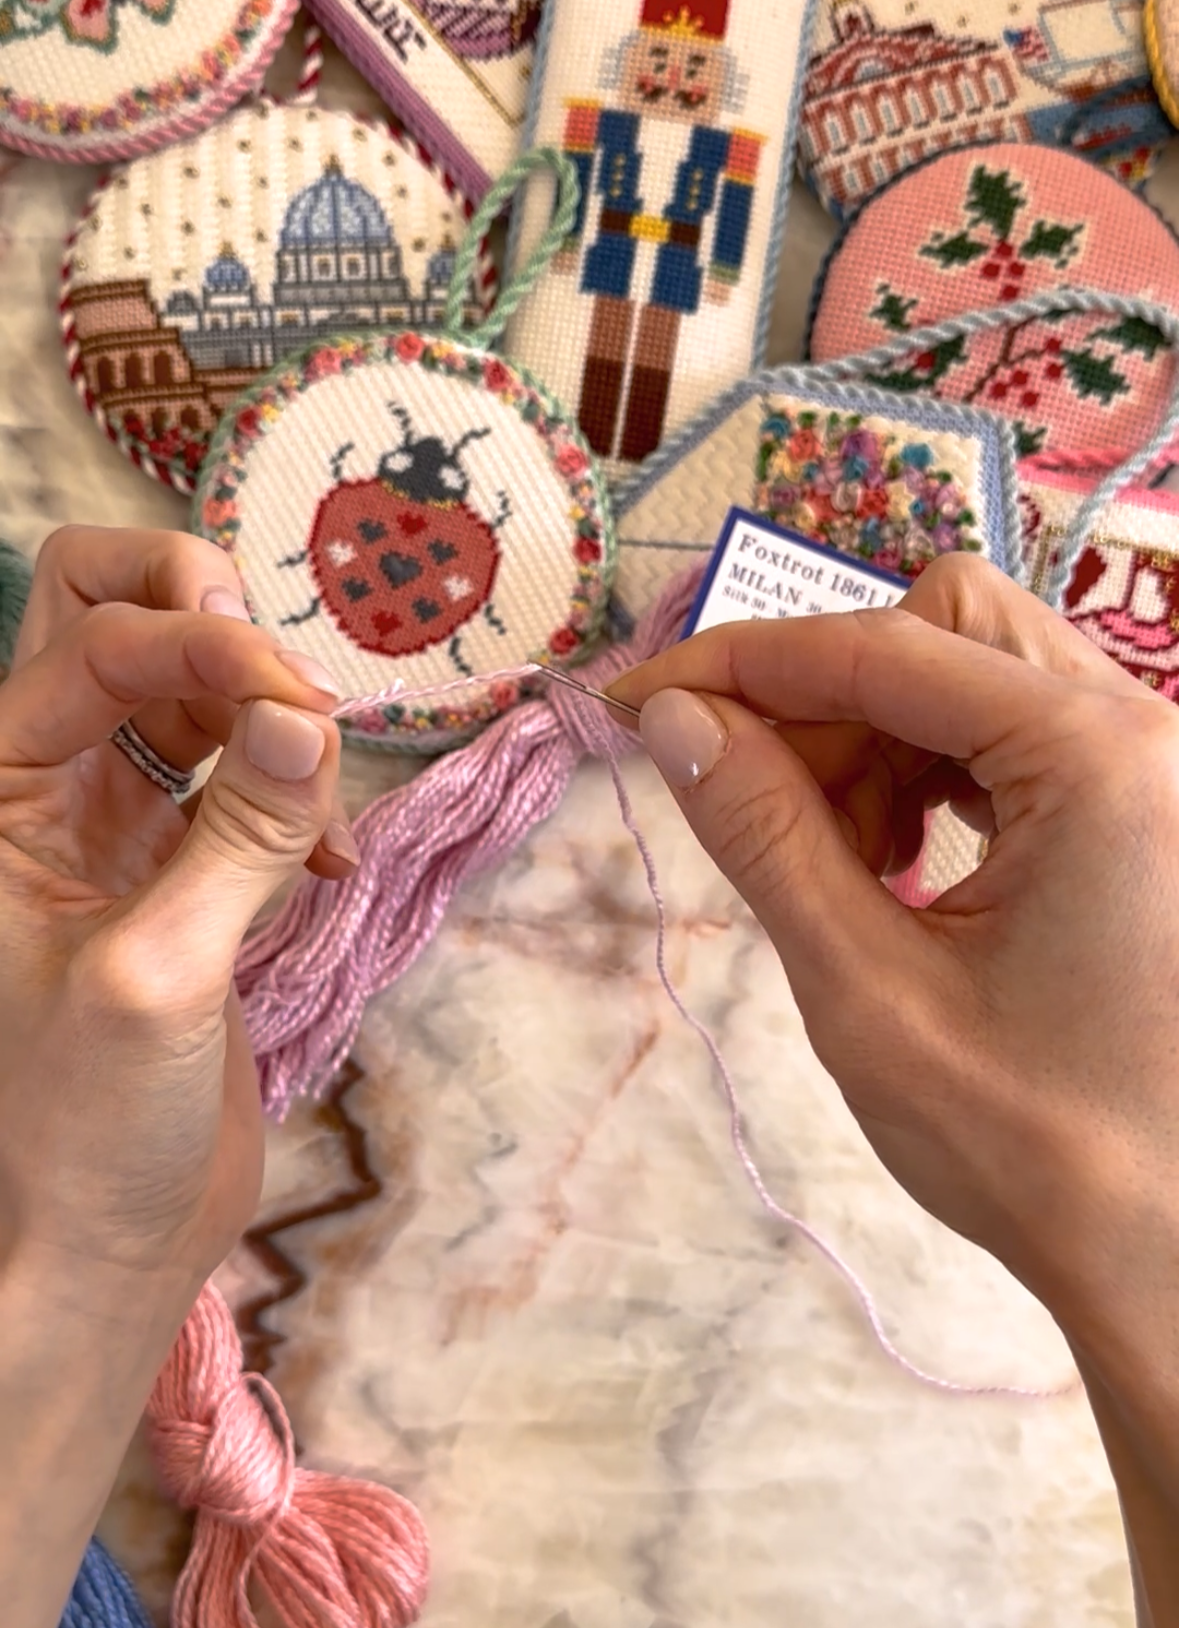
Thread your needle by folding the end of your thread tightly over the needle. Slide the needle out while pinching the folded thread tightly. You can now neatly guide the pinched thread through the eye of the needle. This prevents dealing with the finicky frayed end of the thread.
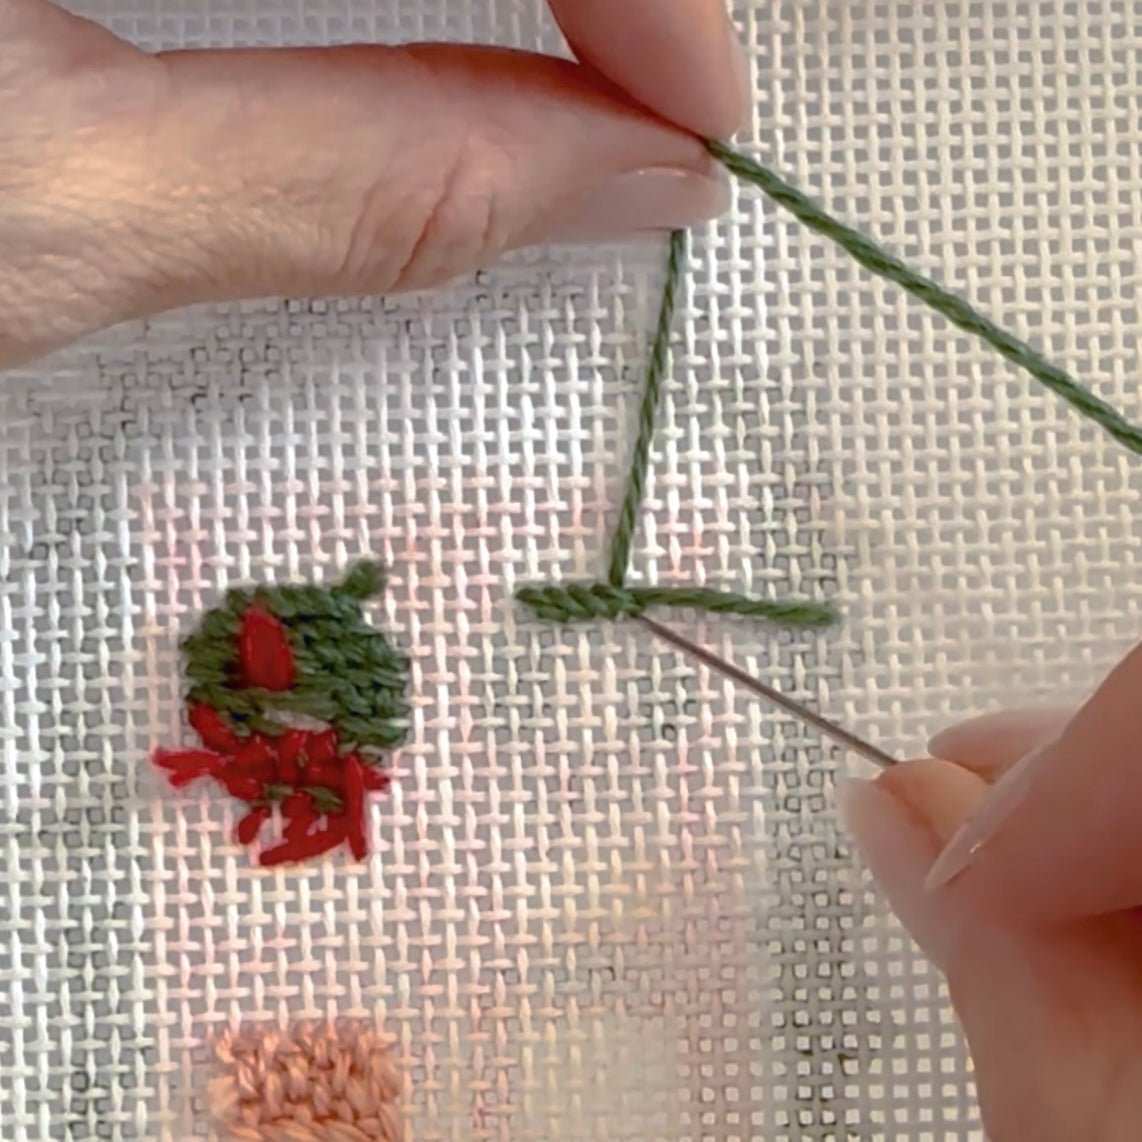
Pull your thread up through the back of the canvas where you want to start stitching. Hold about 1" of thread behind the canvas. Continue to hold the tail of the thread until it is secured by a few stitches on the back.
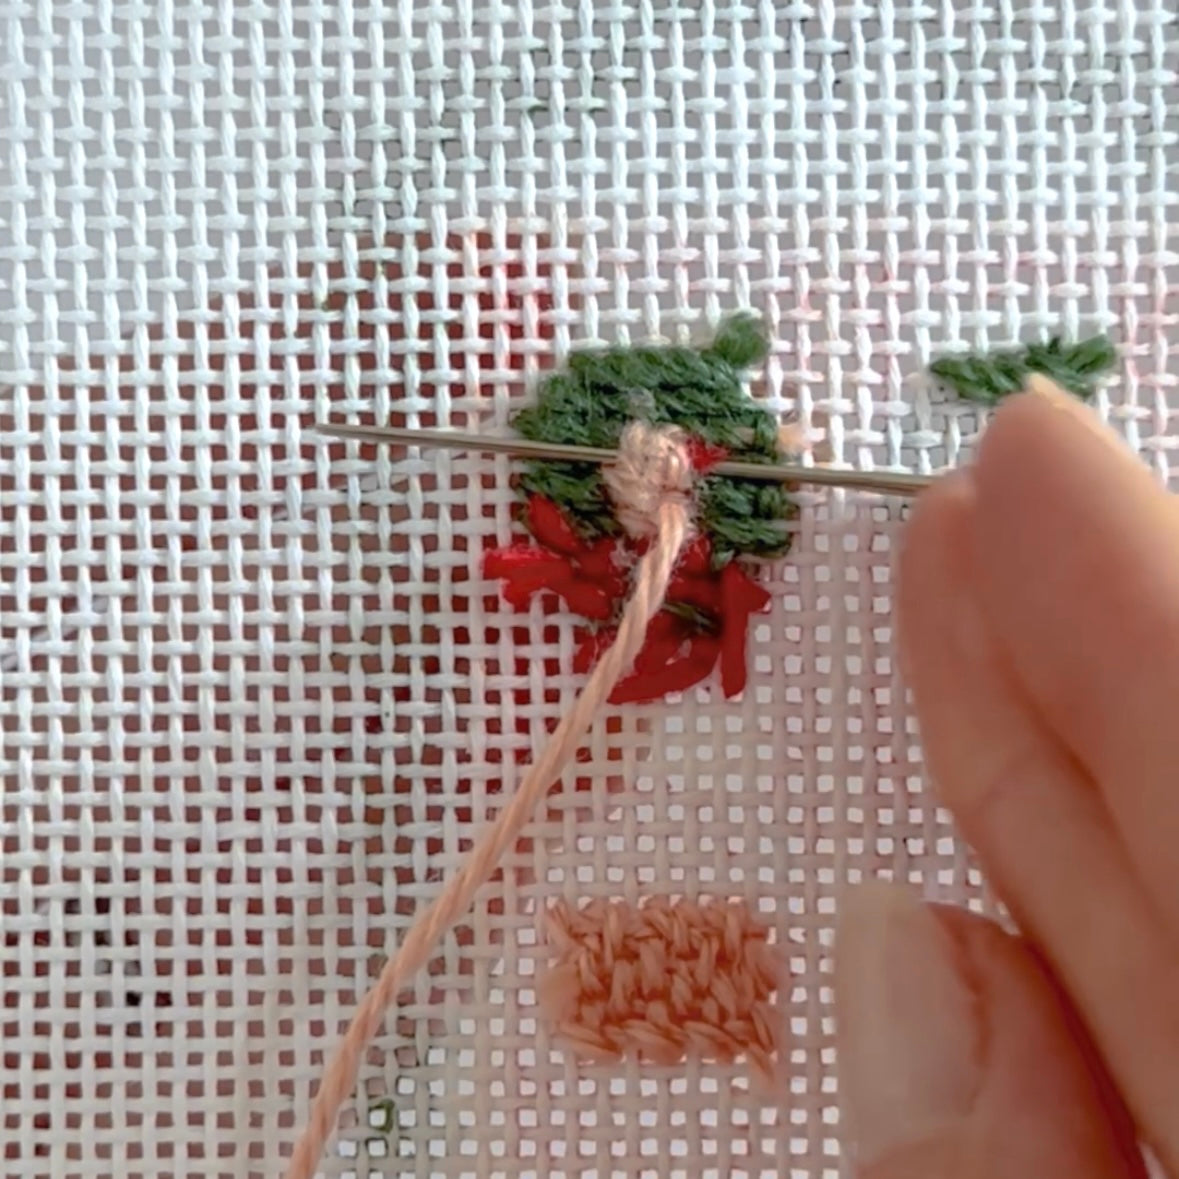
Once you are finished stitching a section or are about to run out of thread, flip your canvas over and bury your needle under a few stitches on the back. Carefully snip the tail with a pair of sharp embroidery scissors.
HALF CROSS STITCH
Half cross stitch is the easiest variation of the tent stitch to learn and uses the least amount of thread, but it is the least durable. Personally, I rarely use this variation except for very small details of the canvas or if I'm playing thread chicken and want to use the least amount of thread possible so I don't run out.
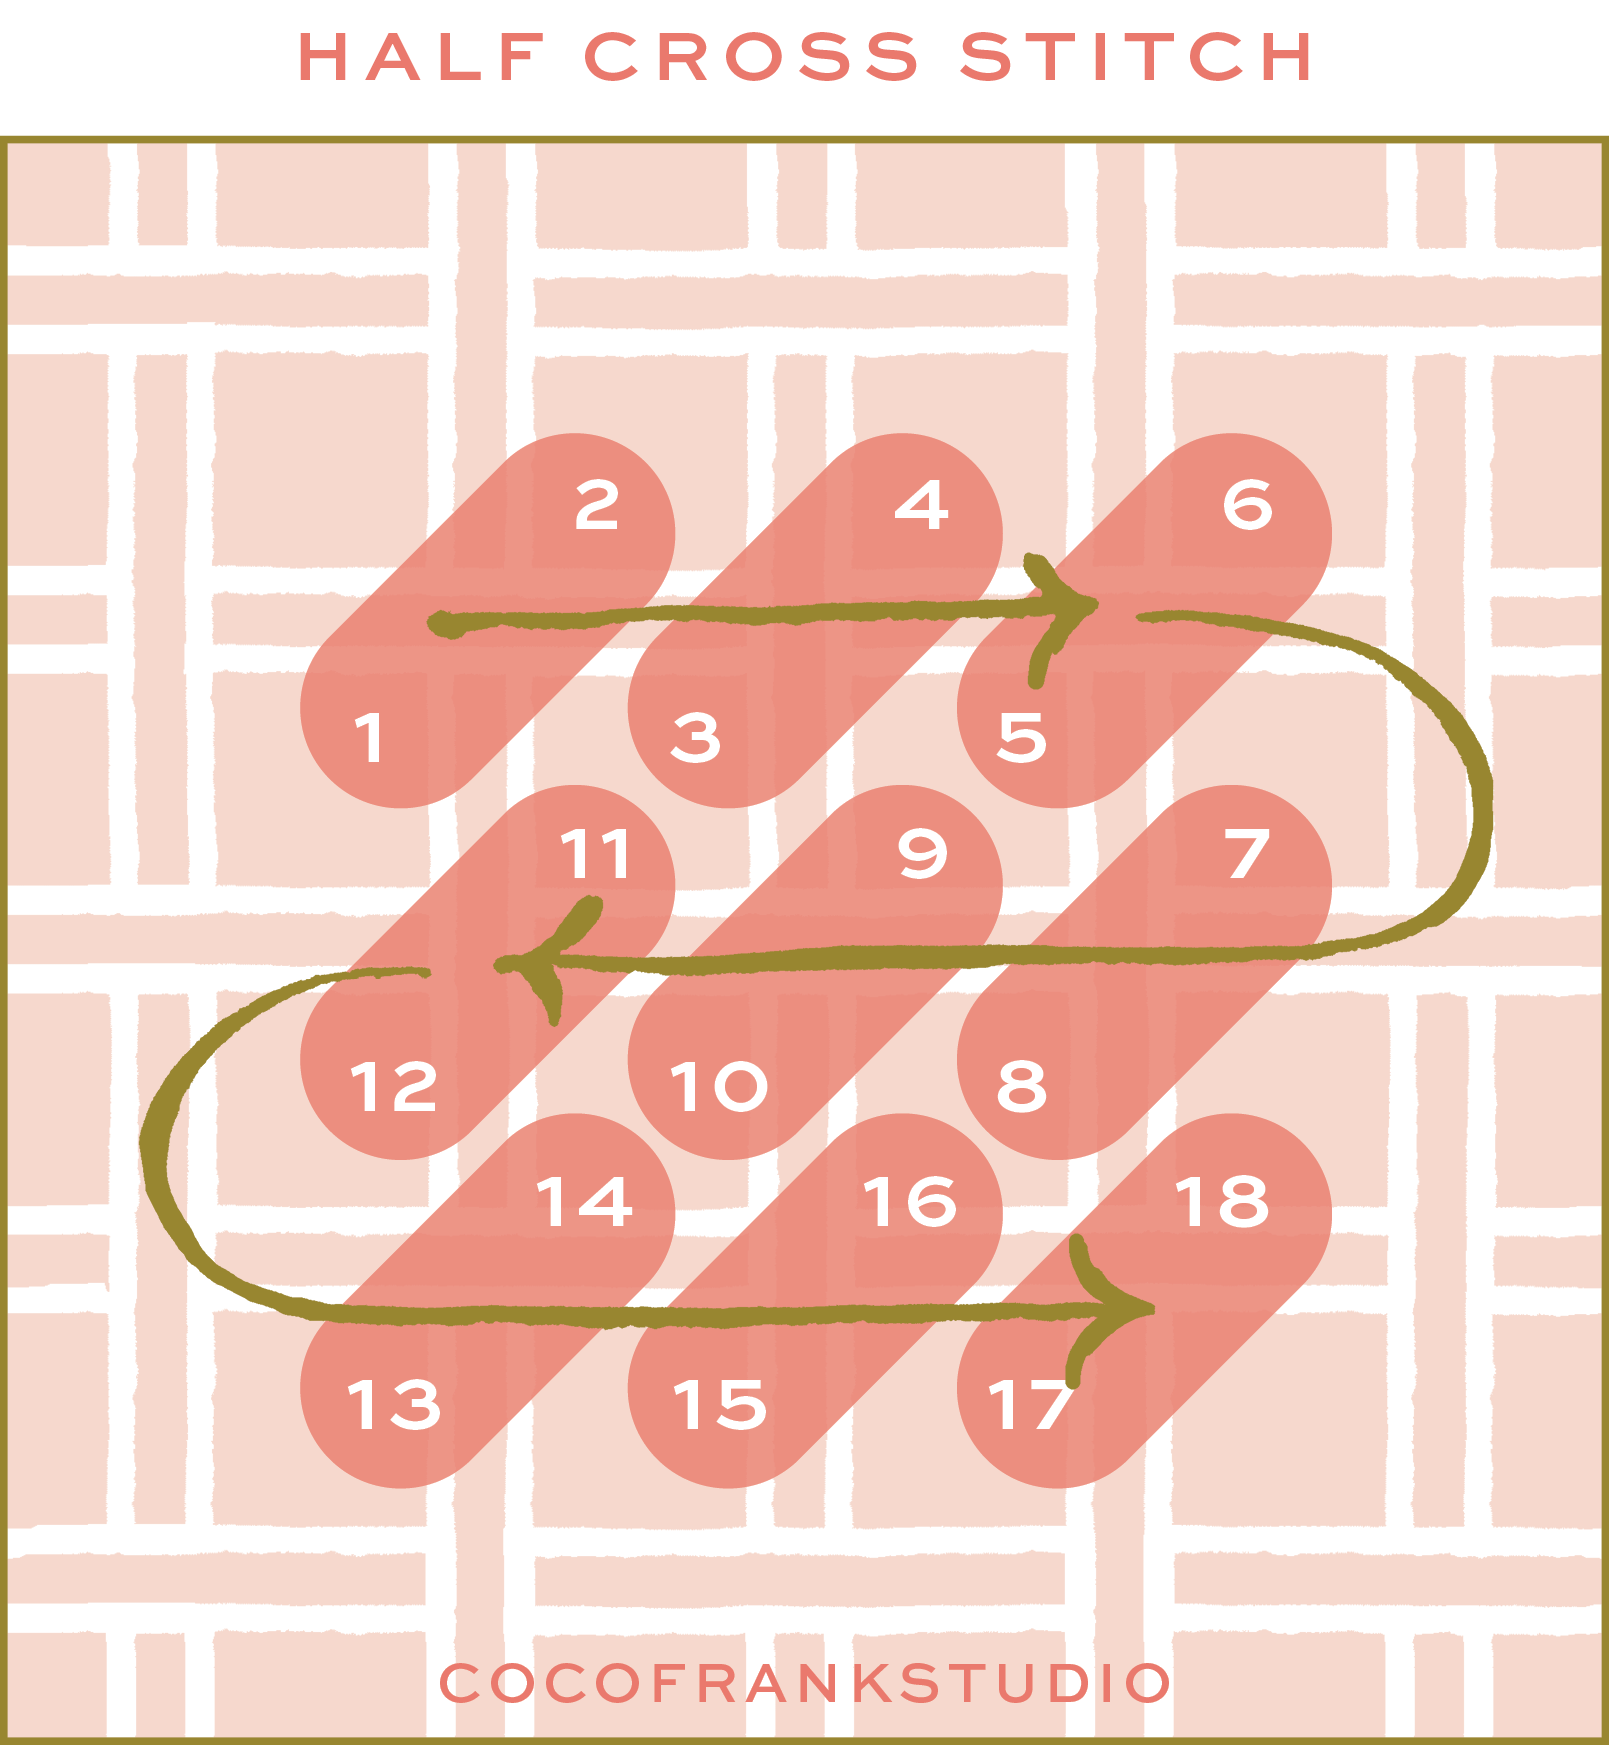
To stitch the Half Cross Stitch, start stitching a horizontal row from left to right. Come up from the bottom left and down through the top right of each intersection. For the second row, come up from the top right and down through the bottom left of the intersection. Continue alternating this way for the remaining rows.
CONTINENTAL STITCH
The Continental Stitch provides medium coverage and durability. This is a great stitch for beginners and helps reduce the distortion of the canvas that naturally happens when pulling your thread repeatedly through the canvas.
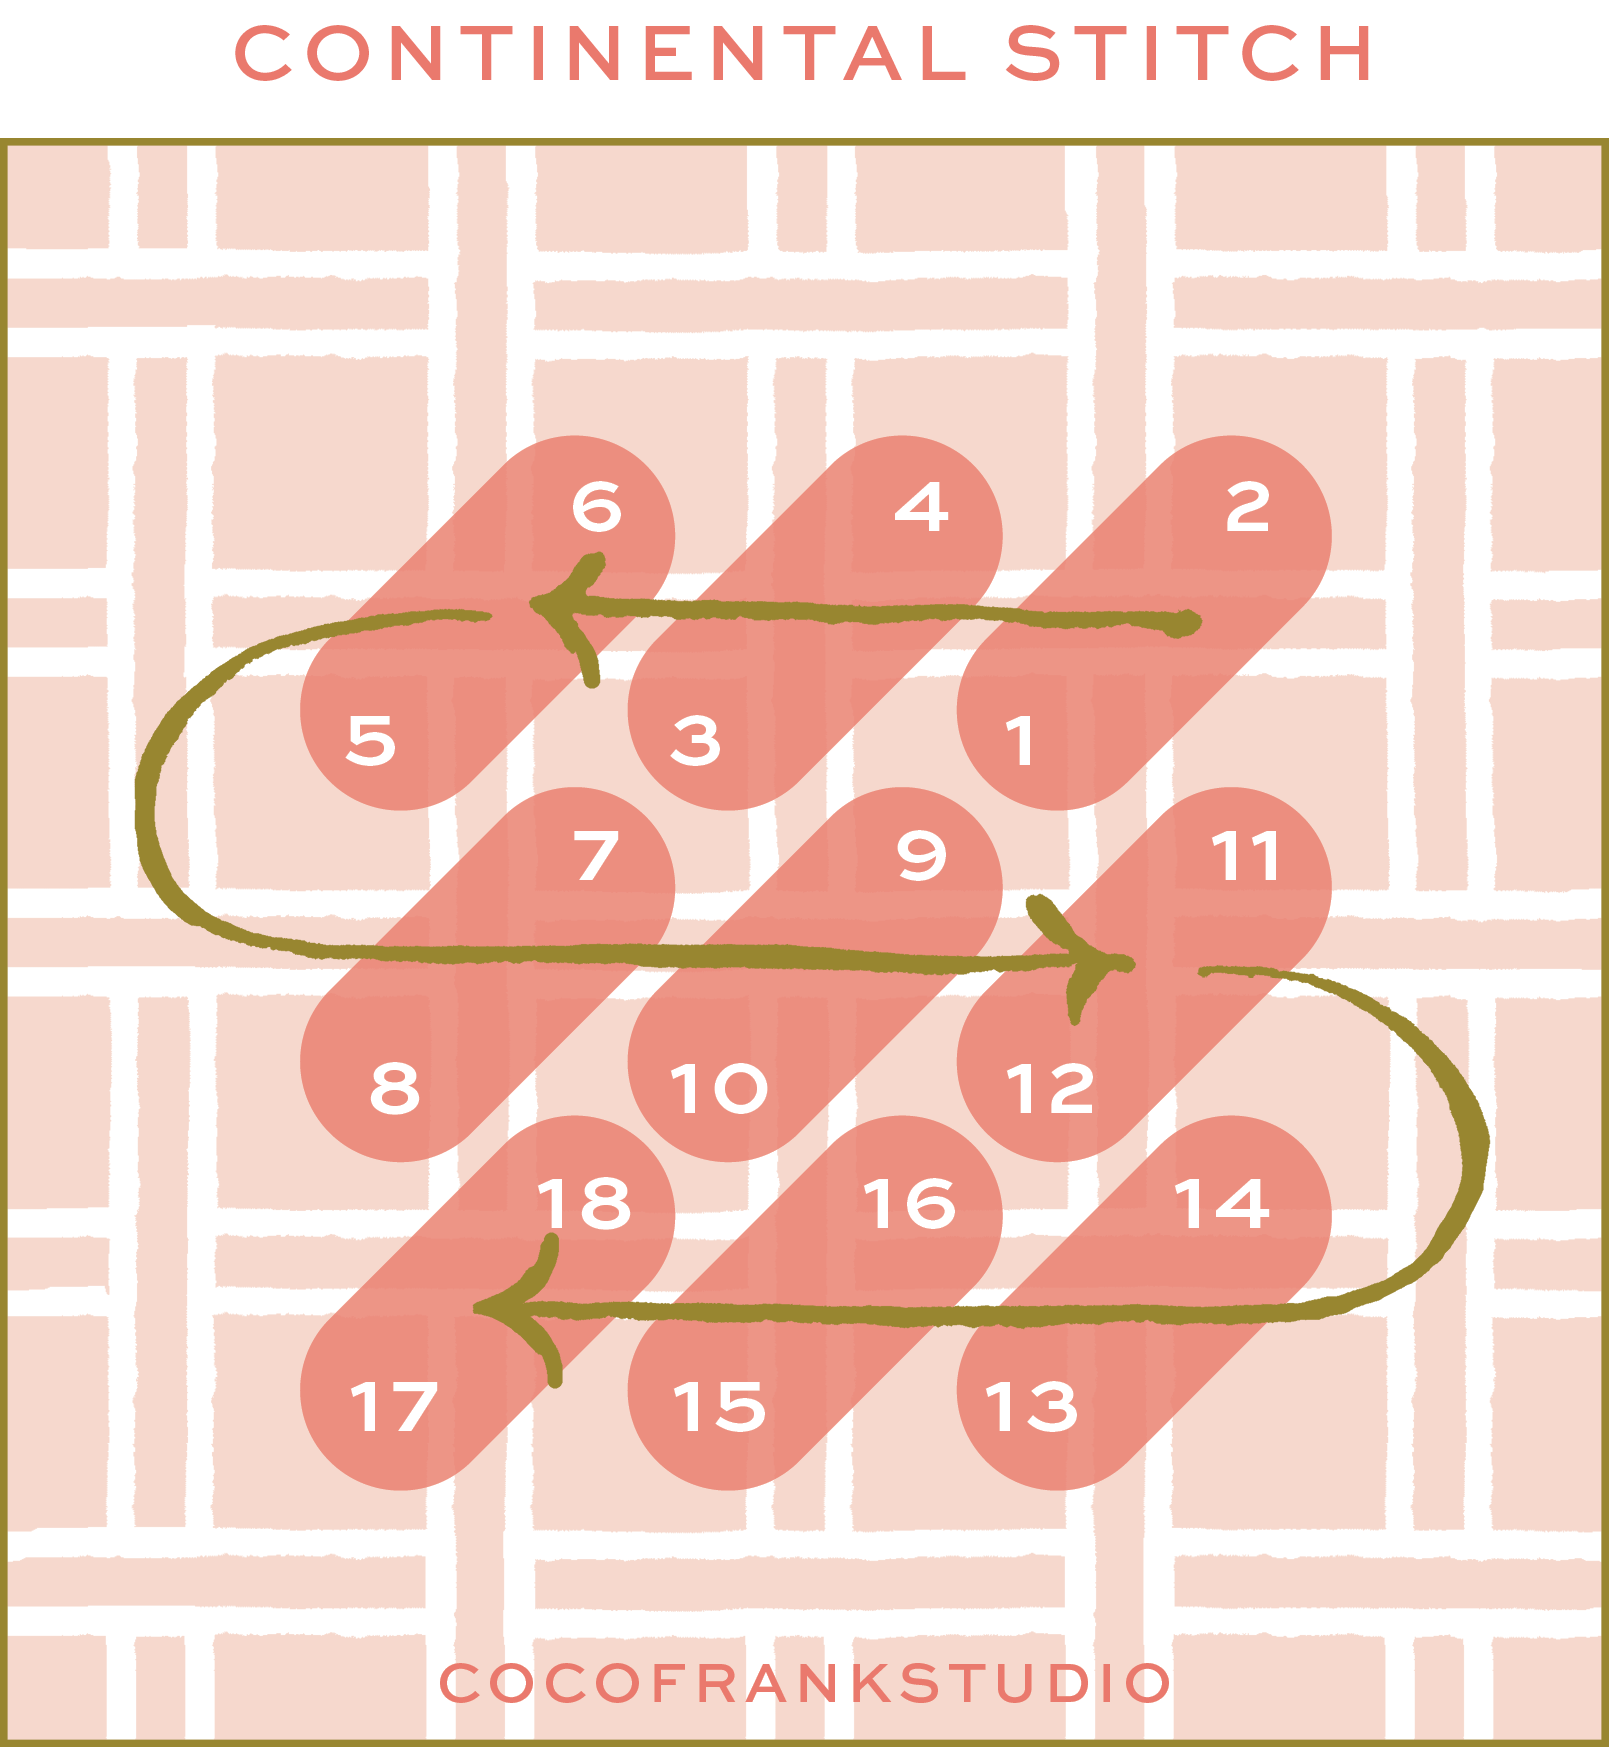
The Continental stitch is the opposite of the Half Cross Stitch. Start stitching a horizontal row from right to left. Come up from the bottom left and down through the top right of the intersection. For the second row, come up from the top right and down through the bottom left of the intersection. Continue alternating this way for the remaining rows.
A Note about Half Cross Stich and Continental
Although we recommend using a mix of all three variations of the tent stitch, you can stitch an entire canvas in just Half Cross Stitch or Continental. Half Cross Stitch is the easiest to learn, but Continental provides more durability and avoids canvas distortion. All in all, there is no “right” way to needlepoint - it should be fun and relaxing! It all depends on your preference and comfort.
BASKETWEAVE
The strongest, most durable tent stitch is basketweave. It provides sturdy, full coverage on the back of the canvas (much like the weave of a basket), making your finished piece more durable. This variation also reduces the distortion of the canvas the most.
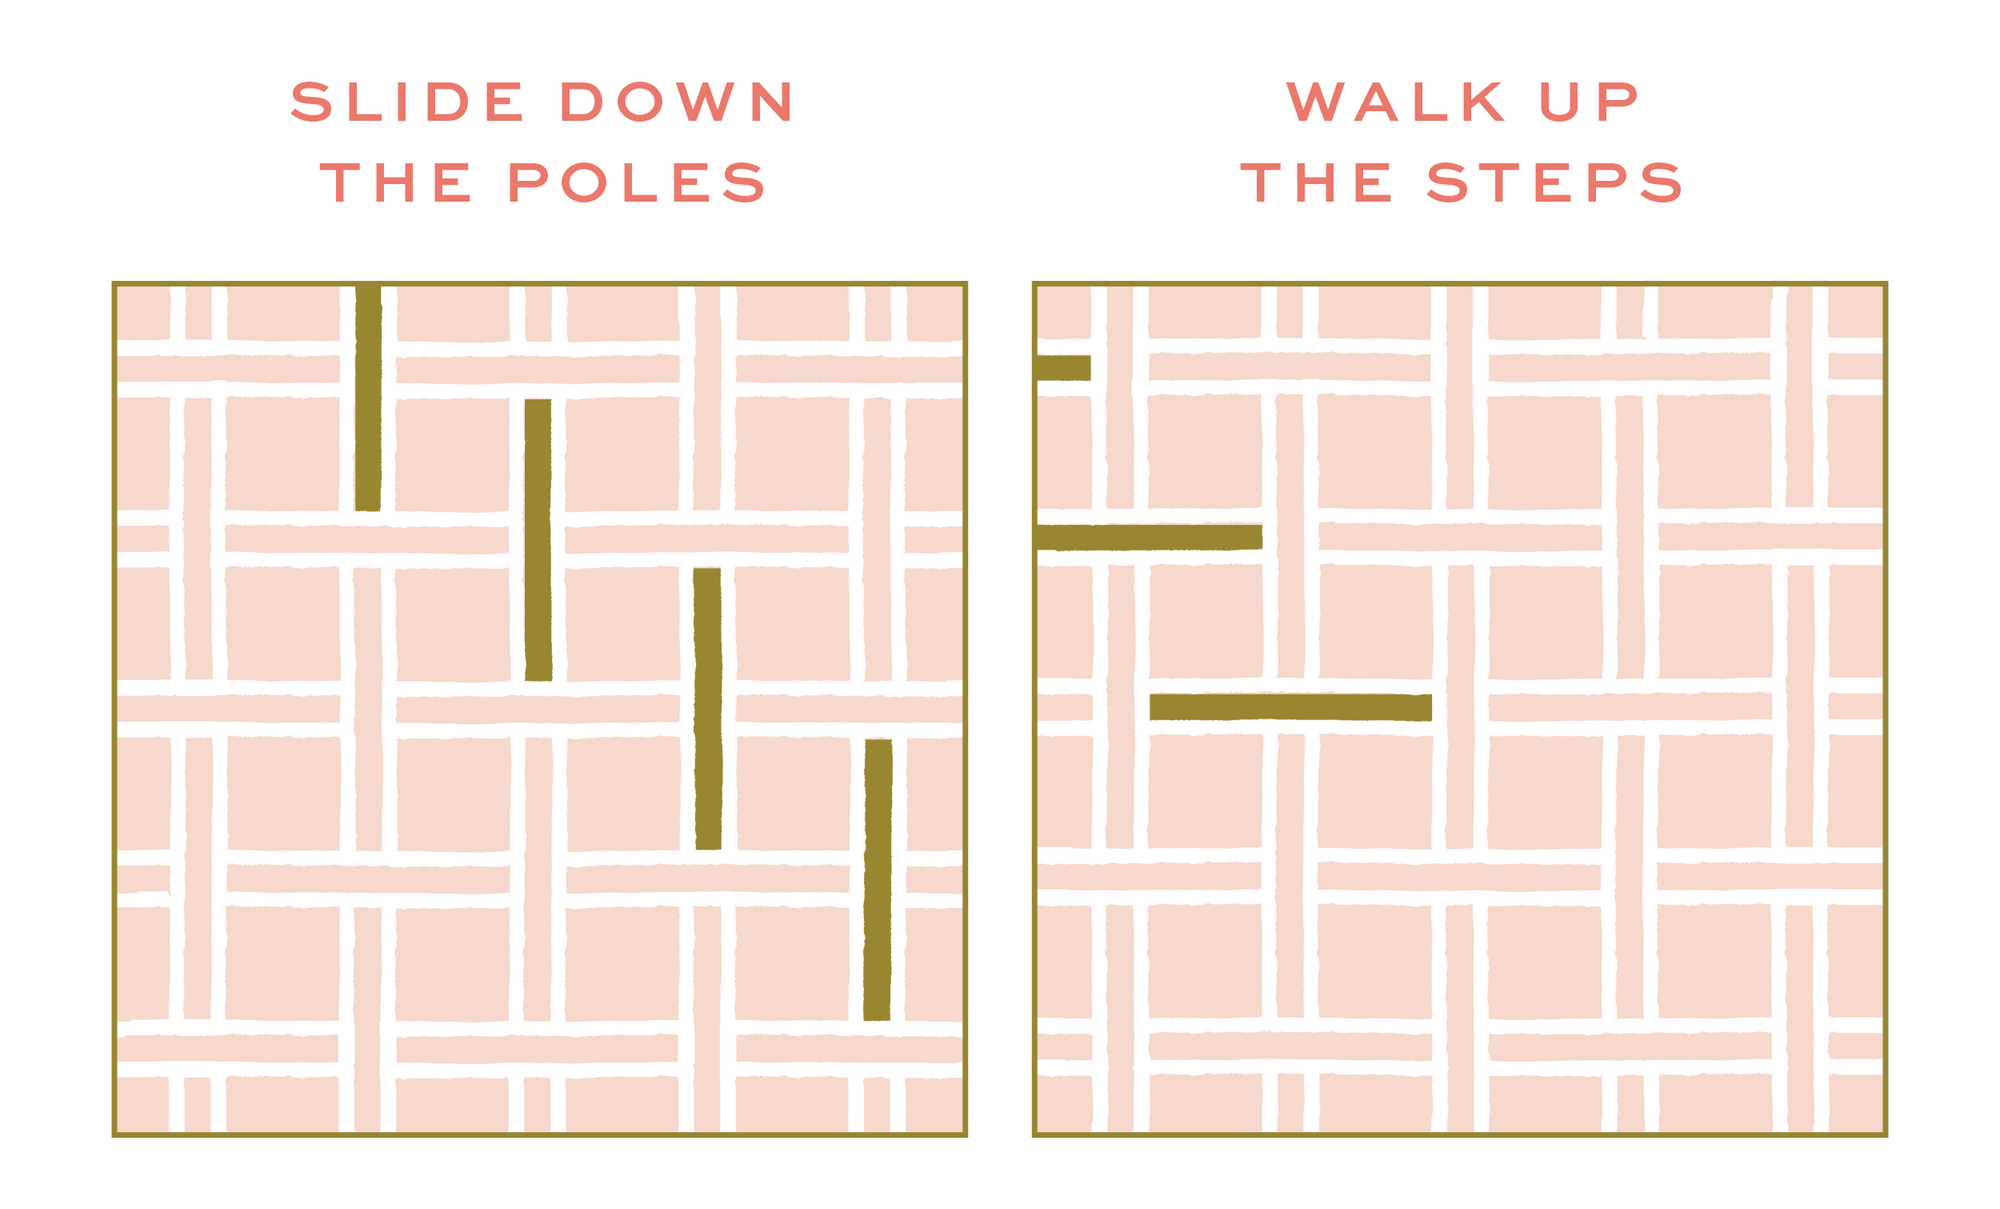
Before you start basketweaving, take a look at the mesh of the canvas. The threads that make up the canvas are woven over and under each other. “Poles” are when the top thread sits vertically and “steps” are when the top thread sits horizontally. For the Basketweave stitch, you will stitch diagonally down the poles and diagonally up the steps.
For each diagonal row, you will stitch up through the bottom left of each intersection and down through the top right, as indicated in the diagram below. You may find it easy to remember you are stitching in the direction from Texas to Maine on the US map.

Ready to start stitching?

